Build:Aggressive Mace/Shield Build
Aggressive Mace/Shield Build is a Character Build in Outward, created by KiyPhi.
Summary
-
Aggressive Mace/Shield Build This build was made to see if you could make a Shield Infusion/Gong Strike viable and make an aggressive shield build.  Breakthroughs
 Required Faction 


Equipment Weapon Off-Hand Head Body Boots Backpack 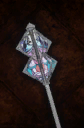 Whiplash
 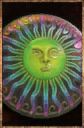 Guided Arm
 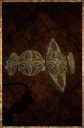 Arcane Unison
 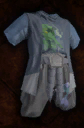 Assassin
  Assassin
-
Quickslots 1 2 3 4 5 6 7 8 


Full Build Details
As stated above, this build is designed to let you play more offensively with your shield. Instead of using it to block and wait for openings, you will use it and your mace to be able to stay close and be aggressive. This build does require some game knowledge as you will have to know what attacks have elemental damage in order to know what you can shield/mace infuse and what you can't. On most enemies that you can't use those skills on, you can take care of with just shield charge and a hit from your light infused mace. This build does have some tank factor to it as well, but is definitely not meant to sit and take damage over and over.
I have said multiple times that I think Scholar Circlet is one of the, if not the, best helmets in the game. Good cooldown, mana cost reduction, and mana regen. You can use Rain over Arcane Unison but I like the little extra cooldown to get my shield skills off as much as I can.
Shadow Kazite Light Armor and Boots with assassin for impact. For groups of enemies and bosses, you can confuse them with flash onslaught and torment will either stagger or put their impact in stagger-able range for your mace or shield. They also boost your damage and help your cooldown. You can switch out the boots for Tenebrous Boots with Speed and Efficiency if you want more mana cost reduction than impact.
For our skills, we are trying to make Shield Infusion and Gong Strike good. For that, the best thing to pair them with is Mace Infusion since a decent number of the enemies that are harder to kill deal some for of elemental damage. Mace Infusion pairs really nicely with Gong Strike since it gives you an imbue. You can also use rags/varnishes for trash mobs.
Another complimentary skill is Dispersion. It keeps your imbue and gives the enemy the hex corresponding to the imbue you have. This is a wildly flexible skill since you can use it to deal damage to enemies otherwise immune to their own element like light mender. You can also use it to apply a weaken/sapped on an enemy at the start of a fight. Apply a varnish/rag/imbue, open with dispersion, and hit them with torment. For bosses that deal ethereal or lightning, it becomes very easy to inflict both as you use an imbue of the one they don't deal, use dispersion, torment, fight for a bit while it cools down, gong strike, mace infusion, dispersion, then torment.
Shield infusion is a natural skill to have as well. It is similar to mace infusion in its use but has an explosion like gong strike on your next block. The main use for it will be to keep in the face of an enemy that deal elemental damage. The explosion is a neat bonus.
For faction, you can choose Holy Mission or Sorobor Academy. Sorobor Academy gives access to Infuse Mana but that is only at the end of the game and you can't split screen if you want to get it early like you can with dispersion. You get cooldown as well but overall, I chose Holy Mission due to getting access to the imbue at the start and I would have to get used to making Spiritual Varnishes either way. Bolt Varnishes are harder to make since ghost's eyes are plentiful and firefly powder is hard to get outside of the Hallowed Marsh. That said, you will fight more enemies that deal elemental damage with Sorobor so pick whichever you prefer. I may do another run and update the page later.
Important Items
| Spiritual Varnish | |
|---|---|
 |
Good for applying sapped hex. |
| Bolt Varnish | |
 |
Good for applying weakened hex. |
| Purpkin Pie/Energizing Potion | |
 / / |
Extra cooldown is never bad. |
| Luxury Tent | |
 |
Best tent for most builds. |
Combos
| Weaken | |||||
|---|---|---|---|---|---|
 > >  > >  | |||||
| Sapped | |||||
|---|---|---|---|---|---|
 > > > > | |||||
| Basic Loop | |||||
|---|---|---|---|---|---|
 > >  > > > > > >  | |||||
| Impact Control | |||||
|---|---|---|---|---|---|
 > >  > > | |||||
| Keep Pressure | |||||
|---|---|---|---|---|---|
>  | |||||
| Useful Buffs | |||||
|---|---|---|---|---|---|
 > >  > >  > >  | |||||