Build:The Warden
The Warden is a Character Build in Outward, created by TheOathseeker.
Summary
-
The Warden The Warden's role on the battlefield is to distract and control his enemies, while setting up his co-op partner to dish out the damage.  Breakthroughs
 Required Faction 


Equipment Weapon Off-Hand Head Body Boots Backpack 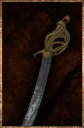 Rainbow Hex
  Telekinesis
  Instinct
 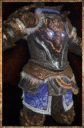 Adrenaline
 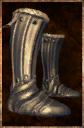 Guidance of Wind
-
Quickslots 1 2 3 4 5 6 7 8 


Full Build Details
Disclaimer
This build is very specifically designed to be played in co-op. Trying to play solo is not recommended.
Purpose
The build does three things:
- Tank damage
- Apply debuffs
- Control enemy mobility
Tanking
You can take quite a few hits because of your high defenses. You have Brace and Counterstrike that allow you to block attacks. You have a lot of powered up boons active, including the discipline boon with master of motion. On top of that you have the Runic Protection buff active, which allows you to use Runic Heal when needed. Last but not least, with the Rainbow Hex, your Steel Sabre has an attack speed of 1.2, Which is really high. If you increase this further with the Wind Imbue, your attack animations will be so short, that you will be able to block and dodge after attacking much faster than any other build. Because you don't need to do the damage, you can focus entirely on blocking, dodging and surviving. Which means you will likely never die.
Debuffs
The Rainbow Hex applies Scorched, Chill, Curse, Doom and Haunted with five hits. Your Frozen Chakram applies Elemental Vulnerability in three hits (Chakram Pierce hits twice if aimed well, so you can apply this with just one Chakram Pierce and one Chakram Arc). And with a fourth hit from your chakram, you can apply Hampered with the Telekinesis enchantment. And finally you use Puncture to apply Pain. This means you can apply a total of 8 debuffs. 6 Hexes for your partner to explode with Torment and Rupture, Elemental Vulnerability to increase the damage and Hampered to prevent them from going after your partner. Not to mention the debuffs that are applied when all 6 hexes are exploded with Torment!
Control
To prevent enemies from chasing you have several tools. First you have your ability to deal large amounts of Stability damage with Chakram Arc and Mana Push. Once the enemy's stability bar falls below half, every hit will stagger the enemy. And your high attack speed will allow you to abuse this very well. And second is the Hampered debuff from your enchanted chakram. Apply this to lock an enemy in place for a few seconds. And third, when the Chill hex is exploded with Torment, it applies Slow Down. And your co-op partner can apply Crippled with Evasion Shot to slow down the enemies immensely. Making sure you can stick on them to destabilize them.
Gear
A few notes on the gear for this build.
Weapon
The Rainbow Hex is a core part of this build, which can only be applied to two weapons: The Steel Sabre and it's legacy chest upgrade, the Cerulean Sabre. The upgrade makes the weapons look much cooler, do a little more physical and stability damage, reduces the attack speed from 1.1 to 1.0. Because you don't use your weapon to inflict damage, but rather stagger and apply hexes, the Steel Sabre is a much better weapon for this build.
Armor
The armor set isn't particularly important. I use the Orichalcum Boots for the large movement speed bonus and the Wolf Plate Armor and Wolf Plate Helm because the 15% cooldown reduction allow you to use your chakram and blocks more frequently. But anything that makes you durable is good. Depending on your mana management you might want to wear a lighter headpiece to reduce the mana cost of your abilities.
Backpack
Really doesn't matter. I picked the Brass-Wolf Backpack mainly for the looks, partly for the armor. But depending on your preferences you might want to take one that gives 'No dodge interference' or perhaps Zhorn's Hunting Backpack for the stemina cost reduction. Or be the ultimate support and take Mefino's Trade Backpack for the extra space.
Combos
| Buffs | |||||
|---|---|---|---|---|---|
 > >  > >  > >  > >  > >  > >  > >  | |||||
| Chakram's debuffs | |||||
|---|---|---|---|---|---|
 > >  > >  > > > >  | |||||
| Destabilize | |||||
|---|---|---|---|---|---|
>  > > > >  > > > > | |||||
| Hexes | |||||
|---|---|---|---|---|---|
> > > >  > >  > >  > >  > >  > >  > >  | |||||
| Runic magic | |||||
|---|---|---|---|---|---|
 > >  > > > > > > > >  | |||||