Build:"Fair" and "Balanced" Manawall Tank
"Fair" and "Balanced" Manawall Tank is a Character Build in Outward, created by Bogeynator10.
Summary
-
"Fair" and "Balanced" Manawall Tank Have you ever thought "Man, why can't I have a build that provides single-target damage, crowd control, tankiness, utility, and healing for myself and my teammates with low resource costs and no movement speed, mana cost, or stamina cost penalties?" Well, you can, and here's how.  Breakthroughs
 Required Faction 


Equipment Weapon Off-Hand Head Body Boots Backpack  Molepig Sigh
  Guided Arm
  Aegis
Aegis  Aegis
Aegis  Aegis
Aegis 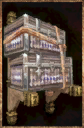
-
Quickslots 1 2 3 4 5 6 7 8 


Full Build Details
You may look at the summary and think "So the build is just good at everything? That seems broken."
It is.
Strengths
- Very, very, VERY hard to kill
- Respectable damage, primarily using the rarely-resisted ethereal damage
- Strong against large groups of enemies
- Excellent sustain during long outings
- Supports allies in multiplayer with healing and damage mitigation
- Often immune to rapid-hitting attacks
- Applies ethereal hex naturally
- Can reach almost full potential before even starting a questline
Weaknesses
- Vulnerable to DOTs, which ignore protection and barrier
- Vulnerable to enemies that deal multiple elements of damage, since barrier can only block one
- Deals somewhat low impact
- Comes with all the clunkiness of Primal Ritualist's instruments
- Uses 4 legacy items and a hard-to-get weapon
- Requires an early trip to Caldera
Overview
This build specializes in stacking as much protection and barrier as possible while still maintaining reasonable damage. Most enemies can't hurt you at all with the proper setup, and since this build deals mostly ethereal damage, it's pretty rare that something resists you, too. Fortunately, Ghost Drums constantly apply Haunted to everything in their range, so even the few enemies that do resist ethereal won't resist it very much. Thanks to Primal Ritualist, this build also performs well against groups of enemies. While it does have a few weaknesses, it's still a great all-around build that can easily get you through all of the game's content, including Unknown Arenas.
Equipment
Manawall set
The centerpiece of this build, providing a massive amount of protection and barrier that puts even the heaviest armor to shame... with none of the penalties that heavy armor normally has. Seems fair, right? We run Aegis on this over Shelter because physical damage is a lot more common than elemental damage and the extra safety against impact is very useful. Also provides +30% ethereal damage, which we'll come back to later...
Vigilante Shield
Boasts a massive 4 protection while still tying for the second highest impact resistance on any shield in the game. Slap Guided Arm on it for even more protection and barrier. It's a no-brainer for anyone stacking protection and barrier like we are. This leaves us needing a one-handed weapon, which brings us to...
Gep's Blade
A powerful ethereal one-handed weapon to perfectly cap things off. This thing is everything we need. Its high damage and attack speed allow it to shred single targets like paper, and the AoE blast makes it useful for fighting crowds as well. The ethereal resistance reduction isn't an issue either because protection and barrier are applied first. The fast, wide swinging animation of one-handed swords is also ideal for Primal Ritualist, since it allows you to easily hit both of your instruments at once. If you can't or don't want to get this weapon early on, the Runic Blade is a fine second choice to hold you over. We don't want to use it as our endgame weapon, though; it can't be enchanted, swings a lot slower, deals REALLY low impact damage, and always runs the risk of its duration running out mid-battle.
Mefino's Trade Backpack
Instruments are very heavy. The drums and chimes together have 12 total weight, which is already just over 10% of our backpack capacity gone. For this reason, I prefer to have the biggest backpack possible. Honestly, though, this is up to preference, and you won't lose any of this build's effectiveness by running something like a Boozu Hide Backpack instead if you really don't like dropping your backpack before combat.
Other (optional) useful items
- Chimera Pistol - Applies elemental vulnerability before combat, giving another nice boost to our damage
- Cannon Pistol - Applies confusion before combat, helping with our low impact damage
- Obsidian Pistol - Applies burning before combat, which our sky chimes will turn into holy blaze - potentially useful in multiplayer for keeping aggro, unnecessary in singleplayer
- Luxury Tent - Gep's Blade swings fast, so stamina cost reduction is very nice
- Ethereal Totemic Lodge - Slightly less stamina cost reduction this way, but it offers another ethereal damage bonus at the cost of physical resistance - again, protection applies before resistances, so this may or may not matter depending on the enemy
- Gold Lich Armor and Master's/Rotwood Staff - If you can spare the carry weight, this can help cast mana-hungry buffs before a fight
Skills
| Pick these skills if you're skimming | |||||
|---|---|---|---|---|---|
 > >  > >  | |||||
We take 2 points of mana from the leyline. 40 mana is good enough for our purposes, and the extra 20 from Peacemaker Elixir will be all we ever need.
Primal Ritualist
We're going for tankiness, and nothing provides it quite like Primal Ritualist. +7 barrier from Sacred Fumes and +5 more protection and barrier from Battle Rhythm. The instruments apply Haunted and Doomed automatically, which Torment conveniently uses to inflict Sapped and Weaken respectively. That's a 40% reduction to all enemy damage and impact. Unlike resistances, these are applied before protection and barrier, which means stacking them is even more effective. Primal Ritualist is no slouch offensively either, dealing heavy ethereal and lightning damage in a large AoE after smacking the instruments enough times. The Ghost Drums also apply Aetherbomb, which is a huge extra source of damage (especially if you can get enemies close enough to be caught in each other's Aetherbomb explosions). This is part of what makes the build's crowd control so good. For best results, put your instruments as close together as possible.
We take Nurturing Echo over Reverberation. The health, mana, and stamina refill of Nurturing Echo allows us to continue adventuring for a long time without resting, not to mention its ability to completely save a losing battle. Just remember to be careful around slopes or enemies when you're casting it; if you get staggered or start sliding and interrupt its animation before it competes, it will go on cooldown without doing anything! Reverberation just provides more damage and AoE, two things we already do very well without it.
This part of the build is especially useful in multiplayer. Weaken and sapped reduce the damage enemies deal to you and your teammate(s), bolstering their tankiness as well. They can also hit your instruments if they're out of mana, stamina, ammo, etc. and have no better way to attack. Finally, Nurturing Echo is an AoE and can heal multiple people at once. Let your teammate(s) know when you're about to use it, and don't be shy about using it just for them if they need it!
Hex Mage
Bloodlust pairs great with your ability to clear crowds, and its ability to restore even burnt stats means you won't need to sleep very often. Lockwell's Revelation can be a huge extra source of damage if you want to play around it, but since the stamina regen penalty of being tired can be an issue, you should only go for this if you're confident you can handle it.
We take Rupture over Blood Sigil. Rupture combos fantastically well with Primal Ritualist's instruments. The instruments will automatically apply Haunted and Doomed to anything in their range, Rupture makes those debuffs explode, and then the instruments immediately reapply them. The explosion isn't just visual, either; an explosion will damage other enemies in its radius. Try to get enemies as close together as you can for best results. As if Primal Ritualist wasn't already good enough at clearing crowds on its own! Blood Sigil increases our already-long setup time before a fight and demands a lot more mana than Rupture to fully utilize. It's not redundant like Reverberation was, but I can't find any way to justify losing out on Rupture when we're already running Primal Ritualist.
Cabal Hermit
Extra damage, extra resistances for the few enemies who can break through our protection and barrier, and Infuse Wind to top it off. A nice way to round out a build that gets its core functionality out of only one or two breakthroughs, which this one does.
We take Infuse Wind over Sigil of Wind, since it helps with our impact damage and pairs nicely with Gep's Blade's already-high attack speed. Additionally, since Gep's Blade deals half of its damage through its ethereal explosion, that half of its damage isn't accounted for by elemental infusions. Wind Infusion has no issue with this since it doesn't directly increase damage at all. Sigil of Wind, like Blood Sigil, increases our setup time and costs a lot of mana to utilize effectively while also costing us Infuse Wind's synergy with Gep's Blade.
If there's a different breakthrough this build doesn't use that you just can't live without, this would be the skill tree to drop for it, since this one isn't as integral to how the build works as the other two. Really, though, Infuse Wind is way too good to skip.
Quickslots
Sweep Kick, Torment, Nurturing Echo, Brace, Welkin Ring, and Haunting Beat should always be on your hotbar. For the last two slots, you're choosing between Rupture, Fire/Reload, The Technique, and Puncture. If you're planning to fight a boss, use Fire/Reload. If you're planning to fight a crowd, use Rupture. If you're planning to fight a boss surrounded by a crowd, use both. If you have an empty slot left over, use The Technique, or use Puncture instead if you haven't learned The Technique yet.
All skills used
- Cabal Hermit - Weather Tolerance, Shamanic Resonance, Infuse Wind
- Kazite Spellblade - Fitness, Steady Arm
- Mercenary - Fast Maintenance
- Philosopher - (None)
- Rogue Engineer - Sweep Kick
- Rune Sage - Dez (Blue), Egoth (Purple)
- Warrior Monk - Brace, Focus, Slow Metabolism
- Wild Hunter - Enrage
- Speedster - Efficiency, Metabolic Purge
- Hex Mage - Torment, Bloodlust, Rupture, Lockwell's Revelation (Optional)
- Primal Ritualist - Literally the entire tree except Reverberation
- Other - Puncture, The Technique, Peacemaker Elixir, all elemental boons
Tips
- Instruments can block many projectiles
- Shield Charge can be used early on to supplement your low impact output
- Torment and Rupture affect ALL nearby enemies with Haunted/Doomed on them
- Use your shield liberally; if an attack is blockable at all, it'll almost never stagger you through your shield
- Any damage done by your instruments, regardless of who's hitting them, will count as your damage and draw aggro towards you, which can be a good thing or a bad thing depending on the situation
- If you reapply Aetherbomb while an enemy already has it, it will reset Aetherbomb's timer without causing an extra explosion. You'll still deal more damage to a single target by spamming a max-charge drum than waiting 15 seconds per explosion, but Aetherbomb deals more impact and has an extra AoE component to it. Decide on a case-by-case basis the best way to use the drum!
- When taking damage from multiple elements, barrier prioritizes blocking the one you have the lowest resistance to, then breaks ties by blocking whichever of the tied elements makes up the largest portion of the attack's damage. Use boons to rig your resistances such that the strongest element in the attack is the one getting blocked!
Preparation
Not every fight will require all of this, so use as much as you think you need. Place the drum and the chimes very close together, and buff with Infuse Wind, Mist, Rage, Discipline, and whichever elemental boons you need to resist the enemy's attacks in case your protection and barrier don't quite cover it. If you have the mana to spare, you can also use Runic Protection. Start with the Cannon and Chimera Pistols IN THAT ORDER for their debuffs (make sure your instruments won't block your shots), and lure the enemy closer to your instruments. Once it's securely in their range, cast Torment to apply Weakened and Sapped, reducing ALL of its damage by 40%.
| Full pre-fight prep | |||||
|---|---|---|---|---|---|
 > >  > >  > >  > >  > >  > >  > >  > >  > >  > >  > > > >  > >  > >  > > > >  > >  | |||||
In battle
With Weakened and Sapped applied, most enemies will no longer be able to damage you when you're standing next to your instruments, and the high attack speed of Gep's Blade paired with Infuse Wind will often make quick work of them. Don't neglect your shield, as its high impact resistance combined with your high protection means you can block a LOT without getting knocked down (but always keep an eye out for unblockable attacks!). Your own attacks are extremely fast, so you should have plenty of opportunities to hit enemies between their attacks. Since your impact damage is somewhat low, use Brace and Sweep Kick to stagger or knock down enemies as often as you can. Rupture can also help with this if you have the mana and space to spare. If the enemy refuses to approach you, your co-op friend has aggro, or you're being approached by more enemies than you're comfortable charging into, try to get the enemy in instrument range and take a bit of time to hit your instruments to build up their charges. Focus applying Aetherbomb with your drum, signified by a purple burning-like effect on the enemy. This is especially useful against crowds, since Aetherbomb's radius is so big that enemies can often be hit by each other's Aetherbomb explosions. If you and your potential co-op partner(s) are running critically low on health, mana, and/or stamina, gather around the instruments and use Nurturing Echo to quickly heal up, or just use it after the fight to replenish yourselves if you didn't end up needing it. Don't forget to pick your instruments up once the fight's over!
"Why not use (skill tree or item) for more protection/barrier?"
This build has enough protection and barrier as-is to be invincible or near-invincible to almost every enemy in the game, and the few things that can manage to stick some damage onto you are usually bypassing your protection and barrier to do it. I already looked over a lot of ways to be tankier, but I decided against them either because the benefit was too small or the cost was too high. Forged Glass and Vigilante Swords provide a fairly minimal amount of tankiness, and you lose a ton of damage by swapping out Gep's Blade. Brass Wolf and Dusk Backpacks both have to stay equipped to benefit you, which means sacrificing your roll. Feather Dodge from Rogue Engineer would bypass this, but the overall usefulness of the tree is pretty limited because we aren't using a dagger and, like sigils, traps would extend our already-long setup time way too much. Rune Sage could offer some extra tankiness and utility, but the tankiness is mostly given through resistances and the utility requires us to use a lexicon to get the most out of it, something we can't do without losing out on our amazing shield. Taking any other breakthrough would probably mean dropping Cabal Hermit and Infuse Wind as well, which is one of Gep's Blade's best synergies.