Build:Control Mage
Control Mage is a Character Build in Outward, created by Alron.
Summary
-
Control Mage Control the battle by massively reducing your enemies' damage and speed while knocking them down and slowing them. Never run out of stamina or mana and deal massive mixed AOE damage. Makes almost all unknown arenas a breeze.  Breakthroughs
 Required Faction 


Equipment Weapon Off-Hand Head Body Boots Backpack 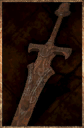
 Musing of a Philosopher
  Aegis
Aegis  Economy
 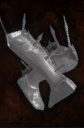 Economy
 Any
-
Quickslots 1 2 3 4 5 6 7 8 


Full Build Details
Yes, a Hex Mage build that does not use Jinx!
For this build the key important elements are:
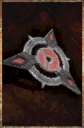
- Hex Mage with Rupture (get this as your first breakthrough point)
- Kazite Chakram (or Ornate Chakram) with the Musing of a Philosopher enchant and the basic chakram skills.
- The two Totems from the Primal Ritualist as well as the Passive to use them both in the same place.
You could swap out the breakthrough point from the Philosopher skill tree for another one as its the least important. Chakram Dance is more of a "nice to have" than a requirement. Cabal Hermit would also be a very good choice, or Rune Sage with the skill that allows you not to use a Lexicon. I like the mana regen Philosopher provides, but anything that does not need an offhand weapon can work here.
This build works extremely well due to the huge synergies between the different skills used. First and foremost, the totems will apply haunted and doomed continuously and for free in their radius, which is pretty large. This means that Rupture and Torment will always have these two curses for free to detonate. The Kazite Chakram with the enchantment will apply Scorched and Chlled after 3 hits, which is very easy to do by using the two basic chakram skills one after the other. This lets you knock down your enemy as well as apply four curses by using just two abilities. Quickly use Torment and Rupture after that, dealing massive damage and applying Burning, Slow Down, Sapped and Weaken all at once. The more enemies there are and the closer they stand together, the more damage the explosions from rupture will deal as well, meaning you can oneshot whole packs of enemies at once.
But the synergies far from end there! Thanks to the totems automatically applying Haunted and Weaken, you can open the fight with Torment, immediately reducing ALL your opponents' damage output by 40% through applying weaken and sapped! This is especially powerful for this build, as we don't have very high resistances, but very high Protection and Barrier. Those stats get exponentially more powerful with weaken and sapped. The 40% damage reduction gets applied BEFORE the flat reduction from barrier and protection. Even quite powerful enemies can barely scratch you. We can get these high amounts of protection and barrier without having to use heavy armor by utilizing the amazing Antique Plate set as well as the breakthrough point of the Primal Ritualist as well as the passive bonuses from standing inside the totems' radius.
On top of that, the chakram skills will trigger the totems as well, so always aim to fight right on top of the totems for extra damage! Since we can apply burning easily, the lightning totem can actually apply Holy Blaze after a while for massive damage over time, and we can also get Atherbomb from the ethereal totem. Every time the totems are triggered, they will hit
Furthermore, by using the Antique Plate Set, we get access to the amazing Economy enchantment, giving us a massive discount to both mana and stamina costs. Combine this with the passive mana regeneration from Philosopher and the fact that we barely use our sword for hitting things, and we will never run out of resources.
For really tough enemies, we can even use the Strange Rusted Sword to apply Elemental Vulnerability in three hits to increase our damage even further, as it stacks on top of the resistance decrease from the curses.
Combat
The basic combat loop of this build goes as follows: Place your totems down before the fight from your skill menu. If you can't, use mana ward for 4 seconds of invulnerability and use this window to place down at least one totem. Once you have your totems down, open with Torment and make sure to pull your opponents on top of them. Hit your opponents with Chakram Pierce > Chakram Arc. This should trigger the totems, knock down you opponents and give you the time to use rupture uninterrupted. Most normal enemies will be dead or almost dead after that. If they are not, you can repeat Chakram Pierce > Chakram Arc > Torment > Rupture until they are.
You want to avoid hitting your enemies with the sword, as you will have to put it back before you can use torment and the damage is very much negligible, plus you open yourself up to being hit while swinging the thing around. There is only one reason we use the Strange Rusted Sword at all, and that is to apply Elemental Vulnerability to the really tough foes. However, this is really only worth it for bosses as all other opponents will die faster if you just use the above mentioned combos instead. This also means the The Technique skill is more of a "nice to have" to apply Elemental Vulnerability more easily, and you can replace it with anything else like Health Potions or a Totem or whatever you prefer.
You have plenty of Stamina to use, so feel free to dodge an run around as much as you need to avoid getting hit between your cooldowns. Those should not be too long however, thanks to the Soroborean Faction passives. It's also recommended to use Cooldown Potions or Purpkin Pie for tougher fights for even more cooldown reduction.
Make sure to use mana ward often, it's one of the most powerful skills in the game! It gives you time to safely use a skill like Rupture with a relatively long cast time.
Always remember, Chakram skills and Rupture deal area damage, so keeping your enemies grouped together will allow you to hit all of them at once and finish the fight much quicker.
One thing to note is that you are SIGNIFICANTLY weaker without your totems! If you fight bosses or a group of tougher enemies, make sure you deploy them before starting the fight and open with a Torment as soon as your opponents have entered the Ring.
You can also use the totems as walls to hide behind! They block projectiles, like the lightning ball from a Mantis Shrimp or from the Gold Lich, making those fight a lot easier as well.
Combos
| Killing an average opponent | |||||
|---|---|---|---|---|---|
 > >  > >  > >  > >  | |||||
| Opening a hard fight | |||||
|---|---|---|---|---|---|
 > >  > > > > > > > > > > > >  > > > >  > > | |||||
| Continuously dealing damage during the fight | |||||
|---|---|---|---|---|---|
| > > > > | |||||
Other
Overall, this build is one of the most powerful I've played so far. If you have trouble with some of the Unknown Arenas, this build will let you bean almost all of them without even needing to use Potions. For example, the three Ethereal Sharks or the three Giants will die very quickly because you can damage all of them simultaneously. Additionally, they deal less damage individually, making the protection and barrier stats even more powerful.