Build:Troglodyte Adventurer
Troglodyte Adventurer is a Character Build in Outward, created by Desperate_Cheeto.
Summary
-
Troglodyte Adventurer For traveling solo, or co-op, this build should allow you to handle any situation.  Breakthroughs
 Required Faction 


Equipment Weapon Off-Hand Head Body Boots Backpack 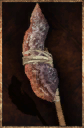
Any 
Any Any Any
-
Quickslots 1 2 3 4 5 6 7 8 


Full Build Details
(To play as a Troglodyte, put a common mushroom in a legacy chest, and then create a new character with that legacy}
This build is designed to be fun, yet effective if desired. Like all builds, these are merely suggestions to help you get ideas. The trog is viable endgame I feel, but only if you are capable with alchemy and cooking. Like all builds having knowledge of attack patterns, and enemy behavior will play a large role in success.
The weather will be an issue, but utilizing Weather Tolerance and potions should get the job done.
If you wish to use mana, I would recommend sacrificing 10 health and stamina, as it nets you 40 total mana. Even though you'll only have 50% mana from sleep, that still leaves you with 20 mana, and with the benefits of Ergagr'Uk!, your most expensive spell, Grog, is 13 mana. If you would like to cast Gurg more often, you may want to take 60 total mana, but it's not worth it in my opinion.
The Mushroom Halberd is not the "ultimate weapon" for this build. What it is, however, is a strong early game troglodyte weapon that you may enjoy using until you wish to be stronger. For the ultimate troglodyte weapon, I recommend Griigmerk kÄramerk for it's overall strength and troglodyte background. For a stronger mid-late game weapon, I'd suggest Horror Halberd or the Beast Golem Halberd. You may also wish to carry a Troglodyte Staff as a light source, I feel this is not necessary because it's pretty heavy, but it's ultimately your decision.
It is imperative that you craft and swap between helms depending on the situation.
For Example, If you encounter a strong enemy that deals high impact/damage, it may be wise to swap to GorkKrog! for the 60% impact resistance. This way you can block and attack with less risk. For weaker/common enemies, it might be more beneficial to use Gargargar!, as you gain 60% more damage, and 25% more impact damage. This way you can kill them quickly without much stamina burn or time. Since Decay enhancements affect afflicted poison, using GoulgGalog! for a more defensive, "kiting" playsytle, by throwing Garg bombs to apply poisoned is also effective, dealing 3 decay damage per second (to enemies without any decay modifiers). Additionally, using GoulgGalog! for non-combat is a good idea too, as it has the highest pouch bonus. There is generally no good reason to use Ergagr'Uk! inside of combat unless you have a weapon with high ethereal damage, or need to quickly cast a spell, because it doesn't offer any resistances.
Combat Strategy:
Lay down Tripwire Traps (Or Pressure Plate Traps if you have Pressure Plate Expertise) as a fall back area before a fight if you are able to do so, and use a varnish of your choosing. Then use a combo of GorkKrog! and standard attacks to try and out-damage your opponent(s), or, for a safer strategy, use Gargargar! and special attacks to weave in and out of enemy proximity. The safest method of attack is described in the above paragraph and involves using GoulgGalog! to poison your enemies to death while you run around them. The last strategy doesn't always work due to resistances or space restriction. If you run out of stamina, you simply have to rely on your endurance potions.
Main Passive skills: Fast Maintenance, Pressure Plate Expertise, Fitness, Steady Arm, Survivor's Resilience, Master of Motion, Blood of Giants.
When you all set up with Master of Motion, boons, and equip GorkKrog!, you should have 60% physical damage reduction, recieve 10 less physical damage overall, and have a blocking impact resistance of 80%, making you a very tanky trog.
Combos
| Trap Setup 1 | |||||
|---|---|---|---|---|---|
 > >  | |||||
This is for early game, when you don't have Pressure Plate Expertise yet.
| Trap Setup 2 | |||||
|---|---|---|---|---|---|
 > >  | |||||
You don't need to use Charge – Toxic, it's just easy to make.
| Apply Buffs | |||||
|---|---|---|---|---|---|
 > >  > >  > >  | |||||
You should almost always have this buff active, except for in the short window that the buff duration ends before the cooldown.
| Weather Defense | |||||
|---|---|---|---|---|---|
 > >  > >  > >  > >  > >  | |||||
You obviously don't need all of these at once, but you should have most of these items in your inventory in case. (Note that Bread Of The Wild will confer the warm boon if you happen to be in Enmerkar Forest for the resoures)
| Before a Difficult Fight | |||||
|---|---|---|---|---|---|
 > >  | |||||
This puts you at 1 hp regen per second, so you have room to tank a few hits.