Build:Def Geppard
Def Geppard is a Character Build in Outward, created by Nyla.
Summary
-
Def Geppard This is an agile, melee fighter build with a well rounded kit that excels at protracted fights.  Breakthroughs
 Required Faction 


Equipment Weapon Off-Hand Head Body Boots Backpack 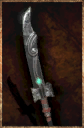 Whiplash
 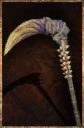 Molepig Sigh
 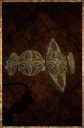 Arcane Unison
 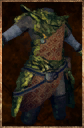 Spirit of Berg
  Speed and Efficiency
-
Quickslots 1 2 3 4 5 6 7 8 


Full Build Details
This character build keeps your enemies close, and your instruments closer with clever positioning. With practice, this build can control the combat space to devastating effect.
What Do I Do With These Instruments?
The Drums and Chimes are placed like you would a Campfire Kit, and are done so via the Haunting Beat and Welkin Ring skills. As you cannot take Feather Dodge yet still must carry multiple sets of heavy instruments (6 pounds each), you will want to set your instruments down as close as possible to each other and then drop your backpack about 2-3 meters away from them, so you are able to dodge roll freely and access your backpack's inventory while still being in range of Nurturing Echo if you use it.
To use the instruments to their fullest, Probe (except for level 4 kind of) is a perfect attack to hit both your instruments and the enemy at the same time due to the range of halberds (the range is exceptionally useful), their moveset, and the overall speed of Probe itself. If there are enemies in proximity of the Haunt or Doom Hex fields when you strike the instruments, they will fire a slow moving, homing projectile of their respective element per enemy, and gain charges per enemy hit by the projectiles. As the number of charges on the instruments increase, so does the damage of their projectiles, the buildup rate of Aetherbomb and Holy Blaze, and the duration of Nurturing Echo. When you start combat, I would recommend you start with the Crescent Scythe, as you can build up Elemental Vulnerability on your target while gaining Alert levels and stacks for your instruments.
Once you have reached max Alert level, you can swap to the Tsar Halberd and start using Perfect Strike to dash through both instruments and the enemy at the same time every 6 seconds. Perfect Strike is best used with the Tsar Halberd due to the large amount of durability damage the skill deals to the weapon used, and the fact that Tsar Weapons are indestructible.
Cooldown Shenanigans
Keeping your Alert levels is critical to the build, as the build is dependent on high cooldown to keep combat fluid and mobile. Gaining an intimate knowledge of your Halberd's reach will help significantly with this, as will proper dodge rolling. During the early stages of combat, it can be beneficial at times to keep your Alert level lower if you find yourself in a situation where you cannot Probe enemies safely, and must rely on Probing your instruments to be your primary damage source.
Mana
When you Acquire Mana, you should take the minimum amount possible, as Stamina is your primary stat, and the Peacemaker Elixir will give you enough mana afterwards to cast all boons and most importantly - Infuse Mana, which is the Ethereal Weapon Imbue spell from The Three Brothers Expansion. The Scholar Circlet with Arcane Unison will mostly mitigate the need for mana potions outside of recovering burned mana and special occasions.
Training
You will want to learn your classes in this order and pick the skills listed below as they are mandatory:
- Moon Swipe - This is a great attack that can do heavy damage to multiple enemies, dealing up to x3.6 damage if you have the Rage and Discipline buffs active and hit both times
- Anticipation - The added Protection is very important to a build such as this. I tried Blitz and it just gets you killed.
- Perfect Strike - Main attack that deals Raw damage, ignoring enemy defense. This damage is not affected by Damage bonuses from armor.
- Flash Onslaught - There isn't any available quickslots for this skill, but the build can be altered to accommodate this if you so choose. I elected to ignore Flash Onslaught and Counterstrike altogether, as the build is fine without them and cramming too many things into a build is bad business.
- Nurturing Echo - This skill has many advantages over Reverberation in this build. Reverberation requires that you stand within 1 meter of your instrument to activate the skill, and because your enemies will be positioned on top of your instruments, you are more than likely to get hit in the face and have the skill be canceled in mid-use, wasting it. Reverberation also consumes the charges of your instrument and requires you to replace it afterwards both of which upset the flow of combat in a build such as this. Nurturing Echo on the other hand, has a 15 meter range of activation, and does not consume charges on the instruments, nor does it require you to redeploy them. With enough cooldown reduction you can reasonably use Nurturing Echo multiple times during longer fights, adding to your overall tenacity.
Purifier Quest
It is recommended you do Purifier as soon as you finish Enrollment. You will want to deliver the the evidence to Hugo Lockwell as he will become a vendor that will allow you to purchase consumables necessary for the build at a cheaper price point.
Consumables
- Purpkin Pie - You will want to clean out both Chef Merchants in Harmattan every time their stock refreshes for ingredients to make these. It is an exceptionally good consumable.
- Warrior Elixir - This potion will grant Discipline, which is a mandatory boon used for activating Perfect Strike. It will also boost the already formidable impact damage. Can be purchased from Hugo Lockwell in the "Aggressive Set" of potions.
- Optional - Stoneflesh Elixir - This will help offset the Impact Resistance penalties that Alert gives, as well as grant Rage for more damage with Moon Swipe.
- Energizing Potion - This is a nice alternative to Purpkin Pie if you are traveling to other regions. You will want to consistently kill all Bonded Beastmasters and their Bloody Beasts you come across while working on your faction quests in order to get the rare ingredient Stingleaf. There is also the repeatable quest in Harmattan Need: Angel Food Cake that David Parks, Craftsman gives. As a final alternative to acquiring these potions, you can always buy quantities of them from Pholiota, provided you have completed the unmarked quest to gain access to them.
- Crawlberry Tartine - Solid stamina recovery food that is easy to make in mass quantities.
- Spiritual Varnish - Can stock up on these until you get Infuse Mana, as they are easy to make.
Combos
| Basic Preparation | |||||
|---|---|---|---|---|---|
 > >  > >  > >  > >  > >  > >  > >  > >  | |||||
| Start of Combat | |||||
|---|---|---|---|---|---|
 > >  | |||||
| Like the Wind | |||||
|---|---|---|---|---|---|
>  > >  > >  | |||||
Optional Equipment
While the equipment listed above is generally your best option as a whole, there are a few other items worth mentioning that may have some or great use:
- Gep's Longblade with Whiplash enchantment. For a lot of less intensive fights you can use this weapon to great effect, but it will break rather quickly if you use Perfect Strike with it consistently.
- Scavenger Scarf with Unassuming Ingenuity enchantment. Keeps you at top cooldown while giving you some extra pocket space for potions or a backup weapon.
- Ivory Master's Staff with Isolated Rumination enchantment. This is purely if you want to meme around with the max cooldown reduction possible in game, as it will allow you to have 3 second Perfect Strikes.
- Vampiric Halberd with Whiplash enchantment. Helpful for recovering burned health that your instrument cannot heal.
Weakness
The main drawback of the build is that during long fights, you will have to rebuff yourself with Discipline and Energized. This can lead to you being exposed to counter attacks, so it is best to keep your items that grant your important effects in your pocket. This way you can always just run away temporarily, rebuff, and come back. Perhaps keeping a means of applying Cripple or Hampered on hand will help with this.