Build:Lightning Warrior
Lightning Warrior is a Character Build in Outward, created by KiyPhi.
Summary
-
Lightning Warrior A lightning/melee build that is able to take on end-game bosses and solid enough progression to clear the game from start to finish with no deaths.  Breakthroughs
 Required Faction 


Equipment Weapon Off-Hand Head Body Boots Backpack 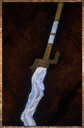 Fulmination
  Inheritance of the Past
  Rain (enchantment)
 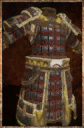 Spirit of Monsoon
 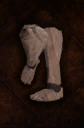 Flux
Flux 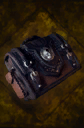
-
Quickslots 1 2 3 4 5 6 7 8 


Full Build Details
This build has a pretty clear progression path thanks to the definitive edition and starts off hard hitting and tanky and keeps it up through the game. I have used this to clear all unknown arenas. With a couple of skill swaps, you also have no issue clearing enemies like light mender or enemies with 100% lightning resistance without having to swap gear. Sky Chimes and Chimera Pistol both help speed things along but aren't needed.
The last breakthrough is really personal choice. You can choose monk for more defense, stamina, and access to counterstrike. You can choose rogue for the ability to use the Light Mender's Backpack which also nets a few extra points of damage but only on the spell loadout. You can choose Rune Sage for more defense than monk with Runic Prefix + Runic Protection and you also gain a longer lantern but have less stamina. The mana isn't important since you regain a lot passively. I wouldn't recommend Hunter as the only thing it really adds is Predator Leap. Mercenary is doable but all you get is run speed which I achieve with Pearlbird Mask and Master Trader Boots anyway. Philosopher is pointless as you are tired all of the time and have Rain/Arcane Unison on your Scholar Circlet so you don't have to worry too much about mana, even when switching to the spell-focused slots. I was never a fan of Spellblade on melee characters since Elemental Discharge eats too much durability on any weapon with durability. Speedster requires too many slots and takes away from your otherwise good tankiness. Ritualist adds to it but you'd have to trade out for the chime placement skills which also sacrifice carry weight.
For skills, we have Moment of Truth, the most broken skill in the game. You can use Mana Ward to lower the window that you take extra damage, Pommel counter inflicts confusion and has crazy impact damage. Counterstrike is there for the large amount of damage and impact it can do. Doom Hex adds more damage. Spark and Conjure are for their use with Wind Sigil and deal massive damage. After doing a deathless run with this build, I have found a new love for Conjure. The ability to cast from a distance gives it some unique uses that deserves mention. You can use it with fairly slow enemies or ones that pretty much don't move the the djinn. I set up a sigil near it and popped Conjure while it was unable to hit me. You can also get good with spacing and timing control and use it to it's full potential. Being able to knock an opponent down into your sigil and conjure on it or time it as they run up just to get blasted is fun. Plus it is just such a cool spell combo and can one-shot a lot of the trash mobs.
Alternative Quickslots
| Moment of Truth | Brace | Counterstrike | Pommel Counter | Sweep Kick | Mana Ward | Mana Push | Doom Hex |
|---|---|---|---|---|---|---|---|

|
 |
 |

|

|
 |

|

|
You can choose to focus on melee as well. I tend to use magic against most enemies as I find it to be fun. Melee only is still very effective and sometimes preferable against certain bosses that make sigil use hard. In this loadout, we take make advantage of the high impact this build can do. Moment of Truth for brokeness. Brace is straightforward, pretty much any meleee build can use it. Pommel counter and Counterstrike are great for keeping up the pressure. Sweep kick after pommel counter is a free knockdown. Mana ward for risky plays or lessening the time you are weak after MoT. Mana Push for even more impact. Finally, Doom hex for more damage.
Important Items
| Lightning Totemic Lodge | |
|---|---|
 |
Free lightning damage, stamina cost reduction, and the only downside is a little less decay resistance which you have in spades. Craft it as soon as you can. It also helps you manage your sleep. While well rested, the Miasmic Tolerance passive helps counter the status resistance loss from boots. |
| Bolt Varnish | |
 |
Easy to craft in the Hallowed Marsh and adds damage. I used these all the time for bosses. You can use other varnishes as well but I never found the need myself. Even against Light Mender and other high lightning defense enemies, you still have enough raw damage, especially after Doom Hex. |
| Dreamer's Root / Poutine | |
 / / |
Helps you get tired fast. Most Soroborean Traders carry the Poutine. Once you get tired in a region, you will be able to manage it pretty easy. These help when on a time sensitive quest. Otherwise you can repair in a plant tent, inn, or your house to get tired with no needs loss. |
| Marathon Potion | |
 |
I always carry a handful of these. Between Purpkin Pie and this, you'll pretty much always have speed up. I only use it over the pie when my sleep is 15% or below. They are relatively easy to get even early game, so it doesn't hurt to farm a few when you run to caldera to get your backpack and miasmic tolerance. |
| Cheesecake / Turmmip Pottage | |
 / / |
Cheesecake is as good in game as it is in real life. With Rain, Very Tired, and this, you won't really need to carry Mana Potions. Turmmip Pottage is easier to get early on. |
Build Progression
I start off gathering what I can for silver, grab an Iron Claymore, get my Writ of Tribal Favor, then head to Conflux Mountain. In DE, you can get both Pommel Counter and Enrage if you talk to Burac with Cloth Knuckles. While on the beach, beat up any shrimp (Push Kick will allow each hit to stagger, so kick, hit it until it starts to stand back up, wait for cooldown and regen stamina, repeat and never get beat by one again) and grab any Blue Sand. While at the mountain, make sure to pick up the two Dreamer's Roots and the Cool boon. We will use them later. When I unlock mana, I pick Sigil of Fire. Try to pick up a few Fire Stones and Astral Potions along the way. Quickslot Spark, Pommel Counter, Sigil of Fire, Enrage, and the potions. Once you are ready, head to Voltaic Hatchery. You can hit and run the first two Golden Minions or use Sigil of Fire and Spark to make easy work on them, depends on your number of stones. You will want at least 2 for the guys further in. After those two, set up a sigil and try to 1v1 the Golden Specter with Spark. If you draw in the Mantis, you'll still be okay, just have to be careful. Once the specter is defeated, throw down another sigil and refill your mana and engage the Golden Matriarch. You should be able to take it down with Spark alone. Grab those light particles. If you have enough resources, take out the rest of the dungeon and grab the lexicon. You can use the Gold-Lich Mechanisms, iron weapons, and some lucky Firefly Powder drops for some easy silver making Gold-Lich weapons.
Once back in Cierzo, pick up an enchanting table, pillars, and an alchemy kit. Take the kit and combine the two roots with the light particle to make four Admiral Incense. If you have four roots, make another set so you can use them to make Luna Incense later. Put out the enchanting table with four pillars located North Close, North Far, East Far, West Far. This will enchant the Iron Claymore with Unsuspected Strength and serve as your weapon until you get Starchild Claymore. It has 61 physical damage but lacks much impact. Next, you can farm Blue Sand to get the chest and boots, only needed if you want the extra defense that run, or sell the sand for extra silver. I save up for Fitness and Steady Arm before heading out. The next parts can pretty much be done in any order but I recommend getting the Monk skills first if you plan on going that route. It makes fights easier than the other trees alone in my experience.
Save up as much silver as you can and head to Ghost Pass. Work your way through and grab all of the Cabal skills.
Head to Berg, you will want Dez, Egoth, and Fal so you can use Runic Lantern and Runic Protection. Grab Enrage from the Hunter tree if you didn't get it from Burac. This build has a lot of high impact so this just adds to that. You can also grab the Mist boon.
Head to Monsoon and grab all of the Monk skills or just bottom three, depending on your third breakthrough. If you go for all, grab Master of Motion and Counterstrike. Perfect Strike doesn't synergize with this build well since we will be dealing mostly lightning damage and it doesn't take into account all the buffs for lightning making it not hit very hard. Counterstrike is better than Flash Onslaught since we will be dealing confusion with Pommel Counter and it keeps our boon for the defense buff, that said, it is ultimately personal choice. From Philosopher, the only thing we will use is Mana Ward. Talk to good ol' Mofat and grab Blessed. If you are going Rogue, you can run through and pull the levers in the Spire of Light to start the quest for the Light Mender's Backpack. It adds a little damage, removes the need for Runic Lantern, and looks swell. Grab every Firefly Powder you can along the way. You will want all the Bolt Varnishes your heart can afford.
In Harmattan, grab Efficiency and Metabolic Purge from the Speedster trainer. Grab all of the Hex Mage skills; the stars of the show being Bloodlust and Lockwell's Revelation. Between the exclusive skills, it really just depends on if you want to dabble in either. This build doesn't need them though. Grab Doom Hex from the headmaster. If you need silver, there is a nice farming run here that can be done with or without fighting. If you can take down golems easily, you'll net yourself several hundred extra silver per run but still worth the time to do it without. The run is linked here. While in Harmattan, you can also use the clocktower to farm any particles you want. I never fully complete the puzzle, just grab the particles I want so I can come back later.
Head to Caldera early. If you aren't planning to use Rogue, run to the Imaculate here and ask for storage. It will give you the Brigand's Backpack. Run to the Ritualist's Hut and grab Miasmic Tolerance and Welkin Ring. If you feel like it, try and grab some of the potion ingredients. This isn't super needed since the build can wait on these until you get to this part of the story but at least grabbing some Crysocolla Beetle for Marathon Potions is useful. You can find them in the snails if you can take them down, the Hexa Stone mining points, and oil pools. Kill at least 1 Calygrey to make the Lightning Totemic Lodge. Any advanced tent works for this, I think camouflage is the cheapest.
You can get Starchild Claymore pretty easily if you feel like cheesing the Manticore. Head to Levant and grab the all the passives, especially Pressure Plate Training and Armor Training. Grab Sweep Kick and the Warm boon while you are there as well. If you are going Rogue, grab Feather Dodge and your choice of Stealth Training or Pressure Plate Expertise. If you already have the Pale Beauty Incense, stop by the Electric Lab and enchant whatever boots you have with Flux. Until you get the Scarlet Boots, I recommend the Master Trader Boots for QoL. The extra damage won't really be needed until you get to the arena bosses anyway. Grab some pressure plates and fire charges or bring some of your remaining Fire Stone along your way there and head Berg. A Fire Varnish can help too. Once you are near the Manticore's area, lay down as many pressure plates and tripwires as you can. Run around and dodge as you get it to activate your traps. Finish it off with your fire buffed claymore and claim one of the best looking weapons in the game. If you want to cheese it early, you can skip enchanting the Iron Claymore. Otherwise, get prepared for a tough fight. Taking it on 1v1 without a complete build can be pretty tough, but still can be done.
Farm a Pearlbird Mask. Not really needed but the QoL is great. I keep mine along with Flux enchanted Master Trader Boots in my pocket. Select opens the menu highlighted on it, two taps of 'A' and I swap to speed. If I see an enemy, I repeat with the boots and circlet now in my pocket for quick combat switch. Takes no time at all.
Final Skills
Hermit:
- Reveal Soul (optional)
- Call to Elements
- Mana Push
- Weather Tolerance
- Shamanic Resonance
- Sigil of Wind
- Conjure (optional)
Kazite Spellblade:
- Steady Arm
- Shield Charge (optional)
- Fitness
Mercenary:
- Shatter Bullet (optional)
- Frost Bullet (optional)
- Fast Maintenance
- Armor Training
Philosopher:
- Mana Ward
Warrior Monk:
- Brace
- Slow Metabolism
- Focus
- Steadfast Asectic (optional)
- Master of Motion (optional)
- Counterstrike (optional)
Rogue Engineer:
- Sweep Kick
- Pressure Plate Training
- Feather Dodge (optional)
- Stealth Training (optional)
- Pressure Plate Expertise (optional)
Rune Sage:
- Dez
- Egoth
- Fal
- Shim (optional)
- Well of Mana (optional)
- Arcane Syntax (optional)
- Runic Prefix (optional)
Wild Hunter:
- Enrage
- Survivor's Resilience (optional)
- Predator Leap (optional)
Hex Mage:
- Jinx
- Torment
- Nightmares
- Bloodlust
- Blood Sigil (optional)
- Rupture (optional)
- Cleanse
- Lockwell's Revalation
Speedster:
- Efficiency
- Metabolic Purge
Primal Ritualist:
- Welkin Ring
- Miasmic Tolerance
- Sacred Fumes (optional)
- Harmony and Melody (optional)
- Battle Rhythm (optional)
Weapon Master:
- Moment of Truth
Specialist:
- Unsealed
Faction:
- Acceptance
- Purified
- Spiritual Communion
- Sanctified Protection
- Elatt's Intervention
General Recommendations
You can use Chimera Pistol if you complete Blood Under the Sun for a similar effect to Doom Hex. It allows you to do it from further away as well but can't be reapplied easily or done multiple times in a row on bosses with multiple enemies. The quest needs to be done prior to your third quest. I never found myself using it though.
Torment is a cool tech on this build if you are having trouble with any physical damage dealing enemies or enemies with high impact. Doom hex then Torment causes the enemy to receive the Weaken debuff which lowers their physical and impact damage by 40%.
Sky Chimes is another alternative but takes up carry capacity and has to be put down and picked up. Useful for fights like Calixa and Light Mender since it can be used to block projectiles as well. I also never found myself using it but I can see why people would use it over the hex as you don't have to get right next to the enemy to use it.
You can use any lightning boosting head gear instead of the circlet but then you'll want to bring mana potions and the extra damage isn't really needed I think. Options include White Wide Hat, Tenebrous Helm enchanted with Order and Discipline, and White Priest Mitre enchanted with Elatt's Sanctity. If you really don't like the look of the Crimson Boots, you can get Krypteia Boots. You don't loose too much damage and they look pretty nice. I often use them for fashion.
Mana Ward helps make things safe. You can use it prior or after to Moment of Truth, use it to get Lightning Strike off safely, use it to protect against things you have a hard time dodging or just to keep in the enemies face. It helps turn fights like Elite Crimson Avatar into cakewalks.
You can get particles from the clocktower puzzle or from unique enemies like Ancestral General in Berg after the third faction quest. For the fire one, you are pretty much stuck with the clocktower method. The linked farming run is generally the best to get the rest of the stuff needed for the incense while getting silver for skills along the way. Not super immersive though.
When making a city for the Three Brothers, if you don't want to go online or use split screen, choose the specialist if you are focusing on the magic, the 3 seconds save on placing the sigil is huge and means you don't have to use Mana Ward prior to placing it. If you do this, you can swap MoT for Mana Push, Torment, Sweep Kick, Brace, or a Potion. Choose weapon expert if you don't plan on using magic much, Moment of Truth is great. Both is best though.
Combos
| Ethereal Bolt | |||||
|---|---|---|---|---|---|
 > >  | |||||
| Lightning Bullet | |||||
|---|---|---|---|---|---|
>  | |||||
| Lightning Spark | |||||
|---|---|---|---|---|---|
>  | |||||
| Lightning Strike | |||||
|---|---|---|---|---|---|
>  > >  | |||||
| Brace to make low impact hits stagger | |||||
|---|---|---|---|---|---|
 > >  > >  | |||||
| Easy knockdown | |||||
|---|---|---|---|---|---|
 > >  > > | |||||
| Runic Lantern | |||||
|---|---|---|---|---|---|
 > >  | |||||
| Runic Protection | |||||
|---|---|---|---|---|---|
>  | |||||
| Weaken | |||||
|---|---|---|---|---|---|
>  | |||||