Build:Iceblood Pugilist
Iceblood Pugilist is a Character Build in Outward, created by JohBenji.
Summary
-
Iceblood Pugilist A frost (and decay) build focused on high single-target damage per second.  Breakthroughs
 Required Faction 


Equipment Weapon Off-Hand Head Body Boots Backpack  Poltergeist Poltergeist
  Shelter
  Sang Froid
 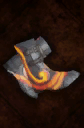 Flux
Flux 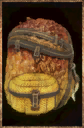
-
Quickslots 1 2 3 4 5 6 7 8 


Introduction
In this build, we boost DPS significantly using the Tokebakicit gauntlets, all while being mana-efficient and stylish. It demands skill but offers immense potential for high-level play and top-notch performance. If you crave strategic, precise gameplay coupled with devastating damage output, look no further. We leverage ignore-hit abilities and powerful skills to maximize our DPS advantage to the fullest.

| Casual Buffing
(water, stamina recovery, health recovery) |
Max DPS Buffing
(potions, varnish) |
|---|---|
| Coming soon :) |
Skills, Status Effects and Mana
A summary of the damage bonuses are given in the table below.
| Damage Type | Damage Bonus |
|---|---|
| Frost | +135% |
| Decay | +135% |
| Physical | +20% |
Could also run physical boosts such as Discipline and Physical Attack Up, which would increase the Physical Damage Bonus from +20% to +70%.
Skills
The three skilltrees that we will invest our breakthrough points into are: Cabal Hermit, Hex Mage and The Speedster.
From the Chersonese:
- Fitness: Gives more HP.
- Steady Arm: Better ability to block.
- Cool (skill): Gives the Cool Boon.
- Possessed (skill): Gives the Possessed Boon (alternatively you can get it at the Antique Plateau).
- Mana Push: For pushing enemies into a staggerable state. (May also be used in the Blood Sigil to damage groups of enemies). (Quickslotted)
- Weather Tolerance: Helps in counter-acting the cold weather.
- Infuse Wind: Infusion used on the Tokebakicit against regular enemies. (Use Ice Varnish against arena bosses).
- Conjure: Conjures the Blood Turret which does impact (and decay) damage and stops their stability regeneration.
From the Enmerkar Forest:
- Enrage: Gives the Rage Boon.
- Mist (skill): Gives the Mist Boon.
From the Abrassar Desert:
- Warm (skill): Gives the Warm Boon.
- Sweep Kick: Knock the enemy down if they have the Confusion status effect. (Quickslotted)
- Armor Training: To reduce the stamina and movementspeed penalties of the Rust Lich Boots.
- Frost Bullet: Together with the Manticore Pistol this is a good way of inflicting Elemental Vulnerability during boss rushes.
From the Hallowed Marsh:
- Mana Ward: To ignore enemy hits and play aggressively. (Also used to get Gift of Blood damage bonus). (Quickslotted)
- Brace: Knock the enemy to 50% stability. (Quickslotted)
- Blessed (skill): Gives the Blessed Boon.
From the Antique Plateau:
- Prismatic Flurry: For burst damage. Works well with Mana Ward if we want to land it safely and easily. (Quickslotted)
- Blood Sigil: Provides consistent healing (Blood Leech), damage bonus (Gift of Blood), and impact damage (Blood Turret).
- Cleanse: To generate more dark stones for the Blood Sigil.
- Lockwell's Revelation: +30% Elemental Damage Bonus.
- Efficiency: Gives more Stamina.
- Probe: Used for cooldown reduction, allows us to use Unerring Read/Prime, and inflicts Confusion. (Quickslotted)
- Unerring Read: To ignore enemy hits and play aggressively. (Quickslotted)
- Prime: Gain an additional use of Brace.
- Blitz: For movement speed.
From the Caldera:
- Miasmic Tolerance: To neutralize the reduction in status resistance caused by the Scarlet Robes.
- Unsealed: Increase the speed at which we place the sigil.
- Brains: +15% Elemental Damage Bonus.
From the The Heroic Kingdom of Levant faction quest-line:
- Alchemical Experiment: +15% Damage Bonus to every Damage Type.
- Kirouac's Breakthrough: +15% Physical Damage Bonus.
Other:
- Fire and Reload: Inflicting Elemental Vulnerability. (Quickslotted)
Important Status Effects
- Greater Frost Imbue: Essentially doubles our total frost damage. (Not needed on most enemies).
- Cool(Shamanic Resonance): +30% Frost Damage Bonus and hot weather defense.
- Warm(Shamanic Resonance): Neutralizes the temperature reduction caused by the Tokebakicit.
- Rage(Shamanic Resonance): Brings Mana Push to ideal levels of consistency.
- Other Elemental Boons: Enhances Prismatic Flurry.
- Needs: Very Tired: Mana recovery.
- Corrupted: +15% Frost Damage Bonus.
- Gift of Blood: +15% Frost Damage Bonus.
- Blood Leech: Provides massive health recovery against bosses.
- Shimmer: +15% Frost Damage Bonus.
Mana
Take one point in mana. The combination of -55% mana cost reduction, Peacemaker Elixir (skill) and staying Very Tired resolves all mana problems.
Specialized Buildings (New Sirocco)
The following specialized buildings are crucial to construct when you are doing the New Sirocco quest-line:
- Alchemist shop with the Levantin Laboratory upgrade for the Toxin Bomb and Kirouac's Breakthrough.
- Enchanting Guild with the Expanded Library upgrade for all the enchanting recipes.
- Gladiator's Arena with the Combat Academy upgrade for Brains and Unsealed.
- Water Purifier with the Fountain of Life upgrade for Sparkling Water and Healing Water (Note: the effects stack). Stamina recovery is sorely undervalued and is one of the most important stats in the game. Don't skip on the sparkling water!
Equipment
A summary of the damage bonuses are given in the table below.
| Damage Type | Damage Bonus |
|---|---|
| Frost | +60% |
| Decay | +25% |
| Physical | -30% |
| Slot Choice: | Reasoning: |
|---|---|
| Weapon: | Tokebakicit has the highest base elemental damage among the gauntlets, and inflicts Chill on enemies (-25% Frost Resistance). This makes it the best choice for maximizing elemental damage per second (DPS).
Why are we interested in elemental DPS though? =>There are 4 reasons:
Why should we use gauntlets as a source of elemental DPS? => The answer is simple: flat damage of elemental imbues scales the best with attack speed. Let us compare different builds and their DPS using the DPS equation we have derived in Build:Iceblood Pugilist#Appendix: Elemental DPS:
From this it is clear that Tokebakicit has a DPS advantage over other options as it does about 10% (multiplicative) higher DPS compared to the second best option. What are the problems with Tokebakicit then, and how can we resolve them? Tokebakicit has four problems:
The low impact is resolved by using Blood Turret, Probe (inflicts Confusion), Unerring Read, Mana Ward, Mana Push, Sweep Kick, and Brace. Blood Turret stops the stability regeneration. Confusion lowers the impact resistance of the enemy and has strong interactions with Sweep Kick and Mana Push. Unerring Read, Mana Ward and Brace enables us to push offensively in a way where impact/stability doesn't matter. The low durability is addressed by using Poltergeist which is going to be updated to provide self-repair as of the October 17th - Definitive Edition Patch (Experimental Branch). There are a couple of ways to deal with multiple targets. Blood Turret and Blood Tendrils with the Blood Sigil is the most consistent method of dealing with multiple opponents. Otherwise we also have the option to use Mana Ward with Prismatic Flurry. If we are fighting against multiple weaker opponents then we can easily one-shot them with the Frost Bullet Imbue. Lastly we have the reach issue. This is not an issue for most enemies, and I have only found this to be a huge problem for one enemy, and that is the Elite Alpha Tuanosaur which has an awful hitbox for gauntlet users. Note (*): The exact number depends on how the averaging is done (I included weights according to the prevalence of different enemies, and how much HP they have). My own calculations has given the following average enemy resistances: Physical 32%, Ethereal -1%, Lightning -4%, Decay 13%, Frost 1%, Fire 8%. |
| Helmet: | Provides great damage bonus to Frost (+10%) and Decay (10%) along with (-20%) Mana Cost Reduction. The enchantment is not central to the build, so feel free to use any enchantment you like.
There are two alternate options Master Desert Veil and Crimson Plate Mask. The Master Desert Veil is similar to the Red Wide Hat and could work as a replacement. It gives more physical tankiness at the expense of doubling down on the lightning weakness caused by being Corrupted, less Mana Cost Reduction, and giving no Decay Damage Bonus. Crimson Plate Mask does not fit well into this build because switching the helmets will cause our Mana Cost to increase by +40%. Our most consistent way of staying safe while being aggressive is using Mana Ward. If we use the Crimson Plate mask then we cannot spam Mana Ward or our other spells. This reduces our survivability and consistency. Even if we gain some resistances from the Crimson Mask, due to probe we will still be unable to be a tank other than blocking, and the Impact Resistance of the Crimson Plate Mask is only 13%. |
| Body Armor: | Provides decent damage bonus to Frost (+15%) and Decay (+15%), (-20%) Mana Cost Reduction, and -15% Status Effect resistance. Sang Froid is used to cover for the fire weakness caused by the Ice Totemic Lodge. Note that the -15% Status Effect resistance is countered by the Miasmic Tolerance passive from the Primal Ritualist.
There are two alternate options: Adventurer Armor and Crimson Plate Armor. Adventurer Armor provides (+10%) more Frost Damage Bonus than the Scarlet Robes but loses out on Mana Cost Reduction and Decay Damage Bonus. A good thing about Adventurer Armor is that it provides fire resistance which covers the Fire weakness of the Ice Totemic Lodge, but we also don't get the burning immunity. Crimson Plate Armor does not fit well on this build as we are missing out on a lot of Mana Cost Reduction. And the Damage Bonus of Adventurer Armor is much more appealing than the increase in defenses. Similarly to the Scarlet Robes, we would likely have to go Sang Froid on these as well to cover up our Fire weakness. They are both competitive with the Scarlet Robes, however, keep in mind that the alertness will counteract our investments into damage resistances, and mana ward will counteract our investments into impact resistance. So they are not as useful as they seem on paper. We pay the 10% (or 6%) damage bonus with a 20% mana cost reduction. The 20% difference in mana cost reduction effectively translates to a 44% increase in spell costs (when using Adventurer/Crimson Plate) due to our prior investments in mana cost reduction. Math: (1-0.35)/(1-0.55) = 1.44... |
| Boots: | Highest Frost Damage bonus (+25%) and provides Mana Cost Reduction (-15%). Flux is used to offset movement speed reduction. They also fit right into the build in terms of fashion. They provide a negative physical damage bonus, but since we are choosing poltergeist anyway to deal with the durability issues, then we don't lose much. |
| Backpack: | Uses a color palette that fits the rest of the build. The best backpack is really Boozu Hide Backpack, but are lacking the color palette. |
| Lantern: | The deep red color of the enchantment fits perfectly. |
| Tent: | Gives +10% frost damage, as well as great stamina cost reduction. The weakness to fire is alleviated through the Sang Froid enchantment on the Scarlet Robes. This is because a lot of the fire damage in the game comes from the Burning status effect. |


Weapon Switches:
- Chimera Pistol: To inflict Elemental Vulnerability. We can use this if we wanna skip using the blood leech and want maximum speed of applying debuffs.
Combat Preparations
Buffing
For normal enemies (non-arena bosses):

| Buffing (Regular Enemies) | |||||
|---|---|---|---|---|---|
 > >  > >  > >  > >  > >  > >  | |||||
This setup means that we don't need to use any consumables. We can in most circumstances also use this casual buff setup for unknown arena bosses as shown in the showcase in the Introduction.
However, we can reach massive damage numbers with the following buffs.

| Buffing (Max DPS) | |||||
|---|---|---|---|---|---|
> > > > > >  > >  > >  > >  > >  | |||||
Inflicting Elemental Vulnerability
For bosses we also wanna inflict elemental vulnerability during the opening. I recommend using Frost Bullet with the Chimera Pistol. Remember to preload the Chimera Pistol with a bullet way before the fight so we don't lose the Cool Boon. We can have both the Cool Boon active on the player and the Frost Bullet Imbue available, we just need to stagger it. First apply the Cool (skill) and wait for the cooldown, once it is available again use the Frost Bullet and then the Cool (skill) after that. This means that we will have a free shot from the pistol every 2 minutes without reducing the damage from our gauntlets.
| Bosses (after the buffs) | |||||
|---|---|---|---|---|---|
 > >  | |||||
Combat Basics
For most engagements I recommend staying at Alertness level 3 if we have Unerring Read available, and Alertness level 2 if we don't have it. Once you intend to enter combat use Unerring Read. This will reduce your alertness level to 2, which will allow you to face-tank a hit for the next 20 seconds as well as make your next probe attack inflict confusion. Mana Ward is also a good way of managing alertness levels.
Indepth: Combat Openers
Brace
We can use the following brace-probe combo to apply confusion to the enemy. However, before using probe we should first use a special attack. This will guarantee that the enemy will be staggered by probe and we don't end up trading hits. This method is an excellent way to build all the probe stacks as well as inflicting confusion. After we have the confusion effect on the enemy, we can easily bully them using Mana Push and Sweep Kick.
| Brace (Altertness Building / Confusion Application) | |||||
|---|---|---|---|---|---|
 > > > >  | |||||
Prismatic Flurry
The second opener is using Mana Ward or Unerring Read into Prismatic Flurry. I will only mention Mana Ward from this point on, but we should try to remember that Mana Ward and the Unerring Read are interchangeable. They have different pros and cons which we discuss later. Prismatic flurry is a risky skill because it has a decently long animation time. By using Mana Ward we can guarantee our safety in-case we get hit. The hits from Prismatic Flurry while having the Wind Imbue will also do high impact which means that we can often continue our assault if their stability drops low.
| Safe Prismatic Flurry | |||||
|---|---|---|---|---|---|
>  | |||||
Probe
The third opener is substituting prismatic flurry with probe to inflict confusion. We can then follow this up with a skill that knocks enemies over such as Sweep Kick or Mana Push. This is useful if we don't have brace available.
| Safe Confusion | |||||
|---|---|---|---|---|---|
| > | |||||
Mana Push
The forth opener is strictly for enemies with impact resistance less than 62% (ignoring Protection), and uses Mana Push while having the Amplified Rage boon. It is very convenient to use because it doesn't require any setup, and works on most enemies. However, it is not fully consistent.
| Mana Push & Amplified Rage | |||||
|---|---|---|---|---|---|
>  | |||||
Indepth: Stability Domination
Sweep Kick + Confusion
This is a very common combo, so I won't describe it much. It will let us knock down any enemy if they have confusion. Managing our Alertness levels with the speedster skills and Mana Ward is important for abusing this with Probe.
| Sweep Kick Combo | |||||
|---|---|---|---|---|---|
>  | |||||
Mana Push + Confusion
The following combo also works on every enemy in the game except for: Crimson Avatar, Gargoyles, Immaculate's Bird, and the Rust Lich. It puts essentially every enemy from 100% stability to sub-50% stability, allowing us to attack them for free as they are now in a staggerable state. It requires the use of Mana Push on an enemy with Confusion while we have the Amplified Rage Boon active.
| Make (Almost) All Enemies Staggerable | |||||
|---|---|---|---|---|---|
| > > | |||||
Indepth: Uses for Prime
The best use of Prime is to get two uses of Brace. This extend our safety window by a lot and will give us enough time to kill any single boss without the chance of them being able to fight back. We could also use this to increase our upkeep on desired buffs such as Enrage. If we have too many stacks of Alertness, then using Prime is a simple way of getting rid of them in-case we can't for some reason use Mana Ward.
| Double Brace | |||||
|---|---|---|---|---|---|
 > > > > > > | |||||
| Improved Rage Upkeep | |||||
|---|---|---|---|---|---|
| > > > > > > > > | |||||
Indepth: Mana Ward vs Unerring Read
In many cases Mana Ward and Unerring Read can be used interchangeably, but they have some nuances to consider if we want to get more value from them.
Mana Ward promotes risky plays because both the duration and the cooldown is short, 5 seconds and 15 seconds respectively. If we mess it up, then it won't cost us much. It works well against multiple opponents as it negates all damage except for the impact damage (actually lowers our impact resistance). Additionally, if we want to conserve alertness levels then Mana Ward is also the best way, as we will only lose stacks if we happen to get hit.
Unerring Read is a skill that should be used in a calculated (and risk-adverse) way. It also works well as a contingency plan. Both the duration and the cooldown is long, 20 seconds and 120 seconds respectively. As a reference, most combat engagements are shorter than 20 seconds, so it should cover a full fight. The most important part is that it only absorbs one attack (all damage including impact damage). Its ability to neutralize impact damage ensures that we can be able to unleash a flurry of uninterrupted attacks if we time it correctly. This also means that we can't get much out of it during group fights since it only absorbs a single strike.
Indepth: Infinite Combo Chain
To increase forward movement, it can sometimes be advisable to use chainable combos. For gauntlets there is only one combo that can be infinitely chained, and that is Combo 1 as can be seen in the Gauntlets page. The pattern goes as the following: Standard->Special->Special->Standard->(Repeats). An example is shown below which illustrates this technique.
| Correct | Incorrect |
|---|---|
Combo 2 will force an idle state, this will reduce our DPS and can in some cases allow enemies to fight back.
Indepth: Hotpocket
We use what is known as the "hotpocket" method to quickly swap between Tokebakicit and the Chimera Pistol. Open the inventory with the inventory button, press the left button to enable the selection of the first item in the pocket, and then press the select button to equip the first item in the inventory. This requires only muscle memory, and if we are on PC, then we don't need to worry about looking for our mouse cursor. See the video for further instructions:
Appendix: Additional Showcases
Elite Crimson Avatar Record (21 seconds):
With a DPS of 517.
Appendix: Elemental DPS
The damage arising from the weapon can be described by the following equation:
 can be described by the following equation:

The damage arising from the imbue is given by:
 is given by:

For more information on these equations see the wiki page on Damage. The total damage is the sum of and . If we assume that the damage type of the weapon aligns with the varnish, and that we use standard attacks we may simplify the expression for the total damage:
 is the sum of
  and
and  . If we assume that the damage type of the weapon aligns with the varnish, and that we use standard attacks we may simplify the expression for the total damage:

The Damage Per Second (DPS) can then be found by dividing by the amount of attacks per second:

Symbols:
- , damage to enemies caused by the weapon.
- , damage to enemies caused by the imbue.
- , base damage of the weapon.
- , skill damage multiplier or special attack damage multiplier.
- , skill flat damage.
- , imbue weapon damage multiplier.
- , imbue flat damage.
- , damage bonus.
- , protection.
- , resistance.
- , weapon attack speed multiplier.
- , time (in seconds) between each hit at base attack speed (1.0) for the given weapon type.
 , base damage of the weapon.
 , skill damage multiplier or special attack damage multiplier.
 , skill flat damage.
 , imbue weapon damage multiplier.
 , imbue flat damage.
 , damage bonus.
 , protection.
 , resistance.
 , weapon attack speed multiplier.
 , time (in seconds) between each hit at base attack speed (1.0) for the given weapon type.
Additionally: As mentioned earlier the resistance can be approximated by using the average resistance value. I have personally calculated this to be: Physical 32%, Ethereal -1%, Lightning -4%, Decay 13%, Frost 1%, Fire 8%.