Build:Paladin of the Light
Paladin of the Light is a Character Build in Outward, created by Crazyhyper.
Summary
-
Paladin of the Light A Tanky Multi-Resistance, Protection build that deals high amounts of Lightning damage. Optimised as a Late-game build but offers cost-effective options. Enforce Elatt's will in Style.  Breakthroughs
 Required Faction 


Equipment Weapon Off-Hand Head Body Boots Backpack 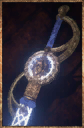 Fulmination
 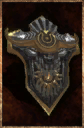 Guided Arm
  Elatt's Sanctity
 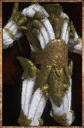 Elatt's Sanctity
  Elatt's Sanctity
-
Quickslots 1 2 3 4 5 6 7 8 


Full Build Details
A Tanky Multi-Resistance, Barrier, and Protection focused build. Makes use of Boons and barrier to protect against elemental-type damage while allowing you to dish out huge amounts of lightning damage.
Take care from DoT effects as barrier does not protect against them. The Candle Plate set has high Lightning and Fire resistance which allows your barrier to resist other elements. Make sure to plan out your adventures and dungeon crawling to have the correct resistances and items/potions to survive DoTs. Parts of the Candle Plate Set can be interchanged with the Tsar Set/Wolf Plate Set/Palladium Set/Caged Set/Ammolite Set depending on what resistances are needed.
This build is decent in solo play but excels in co-op, allowing you to draw aggro and protect your teammates while they DPS the boss.
This build is made as a completed late-game build, with most pieces used in the set being found near/at the end of quest story lines, or at the end of high-level dungeons.
However, there will be cost-effective options allowing players to cut corners in order to afford the build. Feel free to replace weapons and armour as you see fit before you can complete the build. If you have an abundance of silver then feel free to indulge in level 1 skills from trainers listed below.
DLCs The Soroboreans and The Three Brothers add extra building paths within the build, however the build is fully functional and optimal using the base game alone.
If you have any questions or want to help me improve the build/guide then leave a comment at the bottom and make additions as you see fit! Or DM me on Discord - @Crazyhyper#6471
Pros and Cons
General Info
1) Needs Good Patience - Shield play is a very methodical and patient game. The player has to wait out enemy attacks and weave hits in-between. This requires knowing enemy attack patterns prior, or patiently waiting out during combat to learn their attack pattern. Shield Charge is an excellent and fun ability which rewards smart and methodical gameplay.
2) Good Preparation - Good General Game Knowledge and Planning skills are optimal for this build. You will struggle in solo open-world if you do not plan which buffs you want to take e.g. taking decay resist and antidotes in the Hallowed Marsh.
3) The Class is Tank, Not Bruiser - This build is specifically built with being a Tank in mind. While you do damage, it is not optimal to spam left click and constantly eat hits from enemies with the hope that you will kill them first. If you want to path into a more bruiser-esc build, there are options listed within the build that you can consider.
Pros
1) Good Combo Strings - You can chain your Shield Charge, Standard Attacks. and Special Attacks to stun-lock enemies from 100-0 health, provided you burn their stamina bar with your high-impact weapons.
2) Tanky - You can eat many hits and rush to your allies' defence with less worry about having a particular set of resistances on.
3) High Skill = High Reward - Correctly preparing and using your boons, skills & weapons/armour often allows you to clear dungeons and bosses a lot easier than other classes. You can almost eliminate the risk of you, or a friend dying while dishing out insane amounts of damage.
4) Large Storage Capacity - You can carry a lot of weight, even if your bag (NOT POUCH) is overweight, and still play as normal since you do not roll in this build.
5) Very Fun - Being able to be a wall and stand in front of huge enemies is a satisfying feeling. Makes you feel like a true protagonist.
Cons
1) Low Damage against Lightning Resist enemies - Unless using a high raw Phys weapon and not imbuing with lightning.
2) Can not Solo Multiple enemies - Enemies usually flank you and get free hits on your back.
3) Struggles against Stuns/AOE DoT effects - Since you can not roll (unless using brigade backpack and less weight) it is hard to escape from magical AOE stuns or damage effects.
4) Almost no Heat/Cold protection - High resistance Armour often favours either hot weather or cold weather, leaving you lacking on on side. Since your armour weights an insane amount, you may find it hard swap it out for other options while maintaining high defensive stats. Rely on Weather defence potions and Food to survive the harsh climates of the world.
5) Harder Stealth - Since you're quite slow, and basically always glowing, it is hard to stealth or run past enemies in dungeons.
Remember! While there are many cons to the build, many are rectified by simple changes to your build or playing in co-op. Adjust the build to suit your playstyle and your experience!
Equipment Notes
The build has multiple options for Weapons, Armor, and Equipment. Listed below are options that I found to be most optimal for this build.
Warning! These may contain spoilers for dungeons, quests, and bosses.
(All of these rankings are IMO. I did not do the math or work out the stats because I'm lazy. I'm ranking based on personal experience with these weapons)
Ranked from Top to bottom to being the most optimal
One Handed Weapons
| Weapon | Damage | Damage Bonuses | Stamina Cost | Effects |
|---|---|---|---|---|
| Radiant Wolf Sword | 34 LNG | N/A | 4.725 | N/A |
| Tsar Sword | 57 PHYS | N/A | 5.39 | N/A |
| Gold-Lich Sword | 24.75 PHYS
8.25 LNG |
N/A | 4.55 | Doomed (45%) |
| Palladium Sword | 23.25 PHYS
7.75 LNG |
N/A | 4.55 | N/A |
1) Radiant Wolf Sword - The inbuilt lightning damage on the RWS allows you to be ambushed in dungeons and out in the wild, without the fear or need of imbuing your weapon with lightning in order to do damage. The low stamina cost, alongside a good animation set for both Standard and Special attack makes this weapon extremely strong. Becomes very bad to use when facing lightning resist enemies so I recommend bringing a spare weapon. Not optimal if you take Brawns from the Specialist. You obtain it alongside the Holy Mission Questline (must fulfil special condition) so it is optimal in both usage and availability.
2) Tsar Sword - Most raw physical damage of 1H swords in the game. Has to be imbued with lightning for this build though. Note that it attacks the slowest out of all 1H swords. Convenient as it has infinite durability, similarly to all Tsar Items. Is really only lower than RWS because it is not easy to obtain/limited tsar stones in your world. Not optimal if you take Brains from the Specialist
3) Gold-Lich Sword - A very solid option that does has inbuilt lightning damage and hits quite hard. Also inflicts Doom at 45% build up which is amazing, often replacing the need for u to use Welkin Ring in situations where you get ambushed. Is hard for beginners to obtain as the craft materials drop from Golden enemies in the Spire of Light.
4) Palladium Sword - A good option for beginning players who are starting this build, as it is only slightly worse than the GLS above. Can be acquired from the Blacksmith as soon as u get to Monsoon (RNG stock) at 800 silver and can be used up until u finish the Main Holy Mission story quest and replace it. Also drops from the Desert Captain in Abrassar.
Two Handed Weapons
| Weapon | Damage | Damage Bonuses | Stamina Cost | Effects |
|---|---|---|---|---|
| Starchild Claymore | 25.5 PHYS
25.5 LNG |
N/A | 6.7 | N/A |
| Tsar Claymore | 76 PHYS | N/A | 8.5 | N/A |
| Sinner Claymore with the Redemption Enchantment | 41 PHYS | 20% Lightning | 7.2 | Elemental Vulnerability (25%) Doomed (35%) |
| Gold-Lich Claymore | 30.75 PHYS
10.25 LNG |
N/A | 7.2 | Doomed (45%) |
| Palladium Claymore | 29.25 PHYS
9.75 LNG |
N/A | 7.2 | N/A |
This table follows the same ideas and concepts as its 1H Weapon Table counterpart
1) Starchild Claymore - Same concept as RWS. Inbuilt lightning damage means you do not have to imbue before battle however, this has hybrid damage meaning it is still usable vs lightning immune/res enemies. Tops this list by virtue of being one of the most broken and cool-looking weapons in the game. Is obtained from the Royal Manticore, which is a difficult boss.
2) Tsar Claymore - Same concept as Tsar Sword. Most raw physical damage of 2H swords in the game. Has to be imbued with lightning for this build. Note that it attacks the slowest out of all 2H swords. Convenient as it has infinite durability, similarly to all Tsar Items. Is really only lower than Starchild because it is not easy to obtain/limited tsar stones in your world. Not optimal if you take Brains from the Specialist
3) Sinner Claymore with Redemption - in terms of total damage with infuse light, it is weaker than the Tsar Claymore. But if you want to swap out the Shaman tree for spellblade, it is a great option to use in combination with elemental discharge and infuse light. You can open fights with elemental discharge which aggros enemies. On top of that, it has a high attack speed. It also inflicts doom and elemental vulnerability, making it much stronger than the Gold Lich Claymore. Great option for those who want a fast weapon in combination with elemental discharge and the perfect choice if your teammate is a spellcaster, so they can dish out more damage when you inflict elemental vulnerability. This weapon does require you place a Prayer Claymore in a legacy chest in a previous playthrough. If you haven't done that, you can use a Prayer Claymore instead with the redemption enchantment instead. However, this is weaker than the Gold-Lich Claymore. But if you really want to go for spellblade, then the Prayer Claymore is still a better alternative.
4) Gold-Lich Claymore - Same concept the Gold-Lich Sword. A very solid option that does has inbuilt lightning damage and hits quite hard. Also inflicts Doom at 45% build up which is amazing, often replacing the need for u to use Welkin Ring in situations where you get ambushed. Is hard for beginners to obtain as the craft materials drop from Golden enemies in the Spire of Light.
5) Palladium Claymore - Same concept as the Palladium Sword. A good option for beginning players who are starting this build, as it is only slightly worse than the GLC above. Can be acquired from the Blacksmith as soon as u get to Monsoon (RNG stock) at 1000 silver and can be used up until u finish the Main Holy Mission story quest and replace it.
Shields
| Name | Damage | Impact | Impact Resist | Damage Bonus% | Durability | Weight | Special Effects |
|---|---|---|---|---|---|---|---|
| Zhorn's Demon Shield | 48 | 60 | 20% | N/A | 325 | 6.0 | N/A |
| Angler Shield/Slumbering Shield | 55/30 | 55/40 | 19%/17% | N/A | 275/200 | 8.0 | Sapped |
| Crimson Shield | 39 | 58 | 19% | N/A | 260 | 7.0 | N/A |
| Fabulous Palladium Shield | 32 | 51 | 17% | N/A | 300 | 7.0 | Elemental Vulnerability |
1) Zhorn's Demon Shield - Cool-looking shield that provides one of the highest damage, impact, durability, and impact resistances. It is obtained from the Jade Quarry in the Hallowed Marsh which you'll probably be able to do along the way while completing the Holy Mission Questline. (The dungeon is quite confusing so maybe consider using a guide. Don't forget to bring a good decay resistant armour and some potions)
2) Angler Shield/Slumbering Shield - Requires The Three Brothers DLC. Is the highest damage shield that offers a unique effect called Sapped. Also provides immunity to Petrification, Plague, and Breathless which is a nice bonus. Aesthetically it looks epic and provides non-stealth affecting light which lights up your character. The Slumbering Shield is obtained and upgraded to the Angler Shield in Caldera. Is lower than Zhorn due to it's difficulty to obtain.
3) Crimson Shield - An easy to obtain shield that provides stats which scale pretty well into the mid-game, until you can replace it with a different shield. It drops from the NPC Rospa Akiyuki in Vendavel Fortress.
4) Fabulous Palladium Shield - A special shield found in the Hallowed Marsh. It is the only shield that can apply Elemental Vulnerability on shield charge at the second highest build-up in the game at 60% (only bested by Chimera Pistol's 100%). Requires each type of gem to insert into a locking mechanism but otherwise, an easy to obtain shield.
Backpacks
| Backpack | Protect | Special Effects | Capacity | Weight | Preservation | Inventory Protection |
|---|---|---|---|---|---|---|
| Brass-Wolf Backpack | 2 | Provides 2 protection, matching some armour pieces.
Slows dodge |
75 | 4.0 | N/A | 15 |
| Light Mender's Backpack | N/A | +10% Lightning damage boost
Emits faint light source Slows Dodge. |
75 | 2.0 | 25% | 2 |
| Brigand's Backpack | N/A | +15% Phys damage boost
No Dodge Interference Cannot attach Lantern |
70 | 1.0 | N/A | 2 |
| Zhorn's Hunting Backpack | N/A | -10% Stamina Cost
Slows decay of perishable items by 50% |
85 | 4.0 | 50% | 2 |
| Weaver's Backpack | N/A | +20% Status Resistance | 80 | 2.0 | N/A | 2 |
| Dusk Backpack | N/A | +5 Barrier | 80 | 2.0 | N/A | 2 |
| Strongbox Backpack | 2 | Slows dodge.
Slows decay of perishable items by 4% |
60 | 4.0 | 4% | 9 |
1) Brass-Wolf Backpack: The BIS (best in slot) backpack for a tank build where you do not need to roll/dodge. The 2 protection to armour and the 15 protection to backpacked items is valuable when carrying swappable armour pieces in the open-world. This backpack is usually dropped when beginning combat, however it is a very good option in case you are ambushed or when you are the carrier of the party's equipment.
2) Light Mender's Backpack: A unique backpack that provides extra lightning damage. While it does slow dodge, it provides a good 25% item decay protection which will allow you to carry more food items without worry, It is obtained within quest Strange Apparitions in the Hallowed Marsh, meaning it is of decent difficulty to obtain, but still readily available whenever you are ready to complete the quest.
3) Brigand's Backpack: The Physical dmg option for the build. You want to be using this with high-damage raw-phys weapons such as the Tsar Set or weapons like the Sinner Claymore. This is one of the only backpack choices where you do not need to drop as it does not impede rolling, allowing the player to dodge instead of blocking with a shield. Be wary that it does not allow lanterns to be attached so other light options have to be sought after.
4) Zhorn's Hunting Backpack: A very good backpack that gives you a -10% Stamina usage cost. It also slows decay of items by 50%, a massive amount. It is rated lower because a Tank build does not usually need extra stamina rather than extra tank stats. It is also rated lower due to its difficulty to obtain, as it is fetched from the Royal Manticores Lair and requires a Large Emerald.
5) Weaver's Backpack: Requires The Three Brothers DLC. A cool different option that provides status resistance. You obtain it from Caldera from the NPC Merchant Silver Tooth. It will have a 50/50 chance to roll on him between the Weaver's Backpack and the Dusk Backpack. As it takes quite a while to obtain, and the player will most likely have better options by now, it is rated lower.
5) Dusk Backpack: Requires The Three Brothers DLC. Another different option that provides +5 barrier. You obtain it from Caldera from the NPC Merchant Silver Tooth. It will have a 50/50 chance to roll on him between the Weaver's Backpack and the Dusk Backpack. Similarly to it's sister backpack - it takes quite a while to obtain, and the player will most likely have better options, therefore it's rated lower.
6) Strongbox Backpack: A decent quality backpack that can be found quite easily in the Stone Titan Caves. While the Caves themselves are a hard dungeon, the player has the option of quickly retrieving the backpack from the Adventurer's Corpse and escaping back up the rope exit. It does not come close to the level of the other backpacks however it is still a decent early-mid game option.
Armour Sets
Candle Plate Set
| Icon | Name | Resistances | Durability | Weight | Class | ||||||||
|---|---|---|---|---|---|---|---|---|---|---|---|---|---|
| Candle Plate Armor | 28% 30% 30% | 23% | 3 | -12 | 6 | 6% | – | 10% | -6% | 530 | 18.0 | Body Armor | |
| Candle Plate Boots | 20% 15% 15% | 13% | 2 | – | 3 | 4% | – | 5% | -4% | 530 | 12.0 | Boots | |
| Candle Plate Helm | 20% 15% 15% | 13% | 2 | – | 3 | 4% | 15% | 5% | -4% | 530 | 8.0 | Helmets |
The base set you'll be using will be the Candle Plate Set, which you obtain from the Holy Mission Questline. It boasts one of the highest impact resistances (within the top 5) alongside a good all-round resistance spread for Physical, Lightning, and Fire damage. It also has a passive of +20% corruption resistance. In my personal opinion, it looks the best for the build aesthetically, resembling an immaculate.
The only cons of this set are that it is extremely heavy, rivalling the weight of the highest-impact resistance armour sets. You may also have to swap armours or use resistance potions to make up for the other types of elemental damage.
Specfic Armour Pieces that come to mind are: Rust Lich Helmet, Shock Helmet, Runic Armor, Krypteia Armor, Scarlet Boots
Other sets to use or swap pieces from are:
Ammolite Set: Gives a high frost resistance and a unique physical damage boost, while retaining a low weight cost. I recommend using this when using a high damage Phys weapon. Requires a bit of mining but it is worthwhile.
Tsar Set: Almost impossible to fully obtain but good for swapping pieces around. Use this set for extra fire resistance and the higher (doubled) protection stat. The chest provides an extra 10% fire res, while the head and boots provide 5% respectively.
Wolf Plate Set: A lighter alternative set that provides some ethereal resistance without sacrificing protection. Be wary that the armour places a 30% mana consumption debuff on you compared to the other sets.
Palladium Set: A very rewarding budget option for the build. You can obtain this armour set faster than others, as long as you have Palladium scraps (quite common drops in Monsoon) and some Silver to take to the Blacksmith. It provides a very nice 60% decay resist, while keeping the 7 protection stat and 44% impact res. Be wary that the armour places a 30% mana consumption debuff on you compared to the other sets. (It also looks nice as it has florescent strips that run across the armour set)
Caged Set: Requires The Soroboreans DLC. A good set that provides phys, eth, and decay resistance while keeping 7 protection. Is lighter than other options and provides a 20% movement speed boost. Personally, I don't like it (as it's ugly) but also because it sacrifices a lot of resistances in favour of movement speed which is less important in a tank build,
Skills
Listing in Chronological Order of which places/trainers you'll meet first (Provided you follow the main quest story line)
Skills Necessary:
Kazite Spellblade - Shield Charge, Steady Arm, Fitness
Cabal Hermit - Shamanic Resonance, Weather Tolerance, Call to Elements
Wild Hunter - Enrage
Warrior Monk - Steadfast Ascetic, Focus, Brace, Slow Metabolism, Master of Motion, Counter Strike
Mercenary - Armor Training, Fast Maintenance
DLC Trainers
The Speedster - Metabolic Purge, Efficiency
Primal Ritualist - Sacred Fumes, Miasmic Tolerance, Welkin Ring, Haunting Beat, Battle Rhythm, Nurturing Echo, Harmony and Melody
Optional Skills:
Rune Sage - Rune: Dez, Rune: Shim, Rune: Egoth, Rune: Fal (Only Egoth and Dez are needed for Runic Protection)
Mercenary - Frost Bullet, Shatter Bullet (If you want to start combat with a pistol shot)
Rogue Engineer - Pressure Plate Training, Sweep Kick (Good for laying traps for enemies e.g. Manticore)
The Speedster - Probe
Hex Mage - Nightmares (Reduces Max Stamina Recovery so take at your own risk)
You cannot take both specialist and weapon master in a solo playthrough, unless you join someone else's game in which they have the one you dont have in your game. In the latter case you can pick whatever you like. In the former case, choose which trainer you prefer the most.
Specialist - Brains or Brawns (Decide between higher elemental damage or physical damage. Remember to consider the stamina costs). Patience is a good option too if you can access someone else's game for the weapon skills or if you use the standard weapon skills a lot. Patience also works on Elemental Discharge and Gong Strike.
Weapon Master - Pick according to your choice in weapon type (1H Mace, 2H Mace, 1H Sword, 2H Sword)
Combos
Because you only have 8 quick slots, you have to prepare your boons and items prior to entering dungeons. Scout out the elemental-type of the area/enemies of the place and then apply effects to yourself accordingly. Being rested before adventuring is advised.
Here are a couple combos that have had great success for me
| Adventuring | |||||
|---|---|---|---|---|---|
 > >  > >  > >  > >  > >  > >  > >  | |||||
Basic boon stacking and a bolt varnish + welkin ring to do crazy lightning damage. The Stealth potion is optional, allowing you to avoid enemies in Dungeons altogether or to allow yourself/teammates to prepare before a boss fight.
| Skills for In-Combat | |||||
|---|---|---|---|---|---|
 > >  > >  > > > >  > >  > > | |||||
Skills to use mid combat to stun and damage the enemy. Make sure to use your debuffs on enemies when they are distracted/haven't noticed you yet. Keep track of the lightning imbue on your weapon to maximise damage output.
| Full Buff/Boss Battle | |||||
|---|---|---|---|---|---|
> > > >  > >  > >  > >  > >  > >  > >  > >  > >  > >  > >  > >  > >  > > | |||||
Every buff gained here: Blessed, Discipline, Mist, Possessed, Cool, Warm, Stoneflesh Elixir, Elemental Resistance Potion, Shimmer Potion, Warrior Elixir, Healing Water, Sparkling Water, Runic Protection, Luxe Lichette, Greater Stamina Potion, Diadème de Gibier, Cured Pypherfish, Bolt Varnish
Appearance


Appearances always matter, especially if you're a Champion of Elatt. And when you're spending 100 hours staring at your character while dungeon crawling.
Personally I prefer the Radiant Wolf Sword's Neon glow with the Armor as it gives it a nice glow that fits with the atmosphere and aesthetic of Monsoon. (Refer to Important Extra Notes on the Radiant Wolf Sword)
Starchild Claymore is just an op weapon. Also looks good when it's imbued with lightning.
Zhorn's Demon Shield can be swapped with a different shield. Another good option when appearances come into play are the Angler Shield due to the glow it emits. Others shields are: Crimson Shield, Tsar Shield, and Fabulous Palladium Shield
Important Extra Notes
Contains spoilers for the Main Holy Mission Quest Line
The Radiant Wolf Sword can only be obtained if you get a partial success in the Truth and Purpose main quest. Partial success causes you to lose the Acceptance Skill from Oliele. To get both Acceptance and the Radiant Wolf Sword, you will have to use either a legacy chest or play the quest twice.
Complete and achieve a Successful outcome in the Purifier questline in order to receive extra rewards and make the final quest easier for yourself
DO NOT BE BEATEN DURING THE LAST PART OF THE HALLOWED PEACEMAKER MISSION OR YOU MAY NOT RECEIVE THE CANDLE PLATE HELM
If you want to use spellblade instead of shaman, swap the helmet out for either the White Priest Mitre or the White Priest Hood. Or if you don't give a damn about appearance just go with the weird ass looking Rust Lich Helmet.
Comments and Changes
Note to the person who made this build: I tested your build and found the sinner claymore to be a good choice of weapon as well. I added the description in your table for 2H Weapons, along with another column to display the effects and their build up. I also made a bunch of other additions. The changes I made are the most optimized based on my experience while testing the build. Hope you find them useful. Cheers m8!
- Whoever left this note, I'm so glad you enjoyed using the build and thanks for the update! Your comment made my day <3